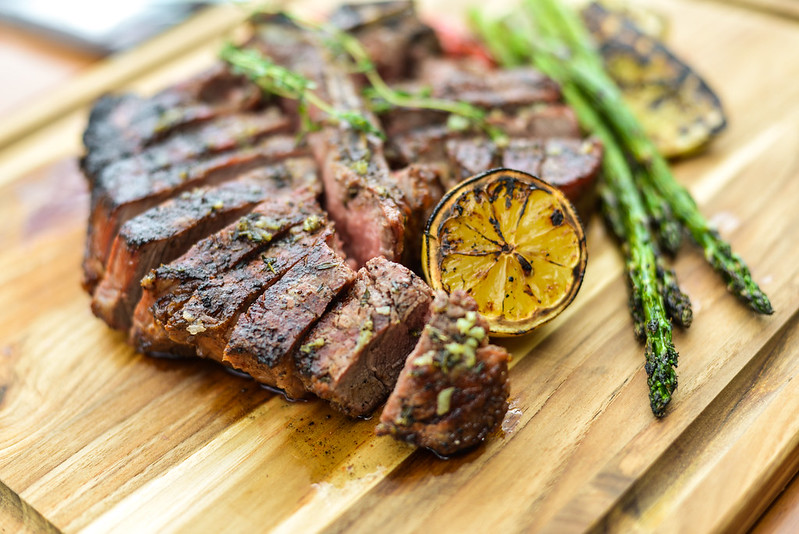
Grilled T-Bone Steak with Garlic Herb Butter

When it comes to steak, I'm an economy cuts man. Well, I say with a bit of grumble that I was an economy man before my choice cuts of skirt, hanger, or flank became so desirable that their market value shot up beyond "bargain" territory. Still, they're easier on the wallet than the high-end cuts like ribeyes and T-bones, which I certainly love, but can hardly justify buying, knowing that I'll be just as happy with a steak a quarter of the cost.
But I'm also a man who would never pass up a porterhouse under the right circumstances, so when Serious Eats asked me to develop a recipe for perfectly cooked T-bone steaks last year (courtesy of Pat LaFrieda Meat) I jumped at the opportunity. The well-marbled, dry-aged prime steaks that were delivered were so beautiful that I affectionately dubbed them "my babies," and promised myself that no harm would come to them.
I've grilled enough steaks to know how to treat them right, but I did pit a few winning T-bone techniques against each other to see if one would ultimately earn me the title of "#1 Steak Dad."
Anatomy of T-bone
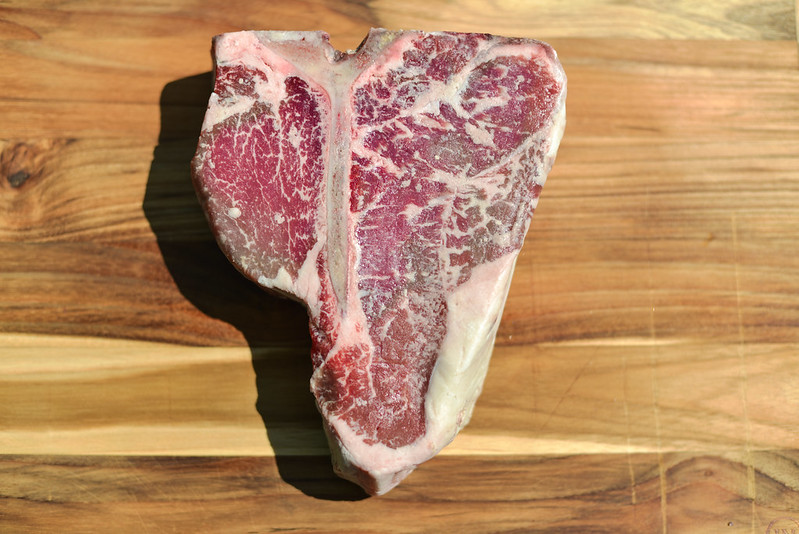
The T-bone is a two-fer: you get both the strip loin and tenderloin in one cut. The bone portion of the T-bone is part of the steer's vertebrae, from the short loin primal (that's the spot between your rib cuts and your sirloin cuts). If you rotate the "T" of the T-bone to be situated horizontally, with the bigger portion of meat on the top, you can better see where this cut lays on the cow.
The strip loin—also called a New York strip steak—is the larger portion of the T-bone. The chunk of meat sits on top of the vertebrae—the back of the steer. On the other side of the bone is the tenderloin, which sits next to the lower part of spinal cord. A single T-bone is only one half of this spinal section. Yeah. Cows are big.
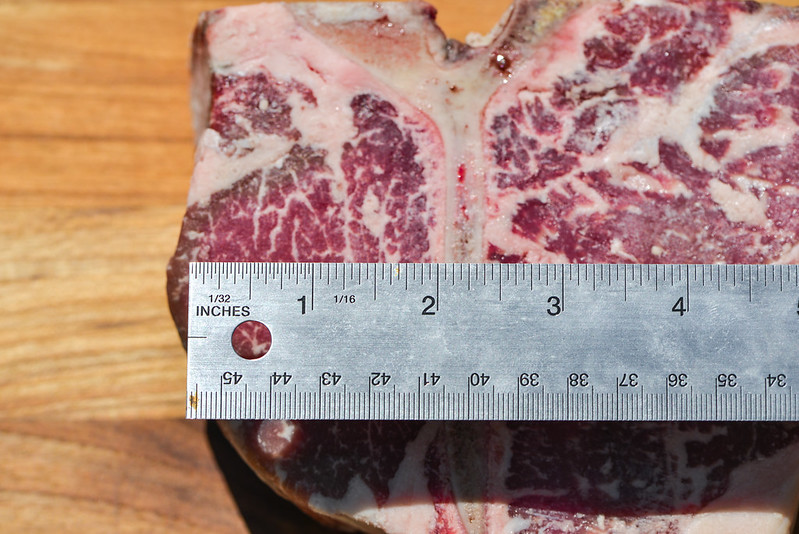
Although it's not a hard and fast rule, to be considered a T-bone, the tenderloin section generally needs to be at least 1/2-inch wide from the edge of the bone to the edge of the meat. When the tenderloin section jumps up to 1 1/2-inches wide or more, it can then gain the title of 'porterhouse,' although technically you can still correctly refer to it as a T-bone. The porterhouse comes from the back of the short loin, where the tenderloin section is larger.
T-bone Selection & Prep
When looking for the perfect T-bone for grilling, there are a few important things you'll want to look for:
Thickness

First and foremost, you want to go thick with your cut. A minimum height of 1 1/2-inches is best; 2-inches is even better. When grilling a steak, you want to be able to develop that dark, crusty sear while keeping the inside a nice rare-to-medium rare. That's a near-impossible feat with a thin steak, since the inside will be thoroughly overcooked by the time the outside develops a proper sear. A hefty cut that's big enough to split between two or more is key to achieving a perfectly cooked T-bone.
Marbling
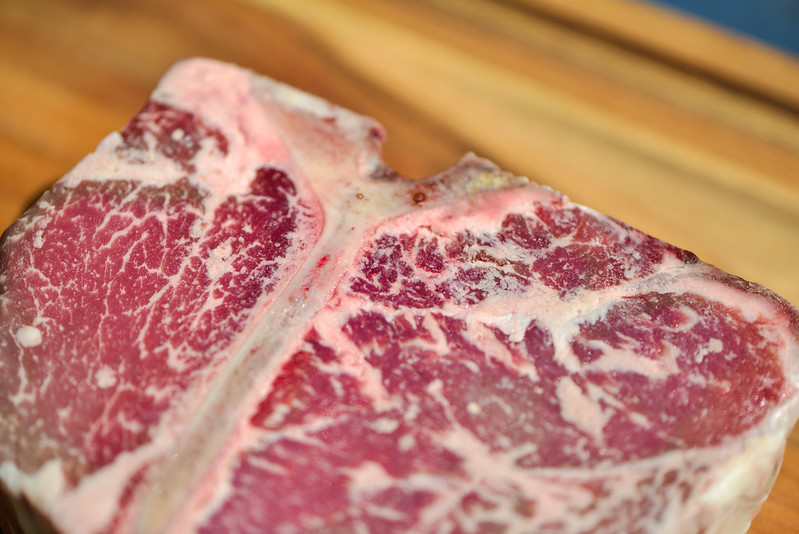
Next, you want to check out the marbling. Marbling is made up of intramuscular fat, and you're certain to see more of it in the strip loin over the tenderloin, but both should have streaks of beautiful white fat in them. This fat is what brings the big, beefy flavor to the T-bone, and you won't get that top steakhouse flavor without it. You should always do a visual inspection to best determine the marbling, but in terms of USDA beef grades, Prime is the label to look for. 'Choice' is the next step down in marbling, followed by 'Select.'
Size of Tenderloin
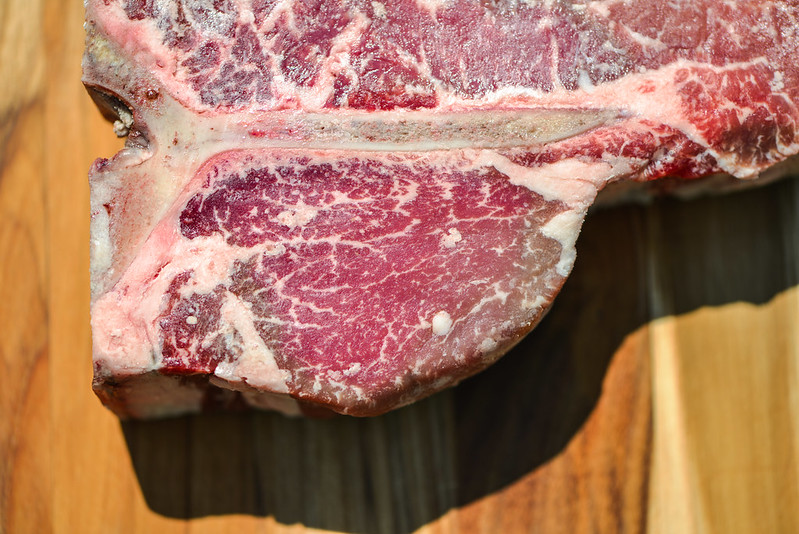
Finally, if you want that tenderloin section to be all it can be, it's best to choose a T-bone with a generous portion of tenderloin. Fat doesn't just deliver flavor—it also insulates. Because the tenderloin is leaner, it'll always cook through more quickly than the strip; the smaller it is, the faster it will do so. To ensure the filet section of the T-bone comes out to a respectable medium-rare, porterhouse size tenderloin sections of 1 1/-2-inches or larger are definitely the way to go.
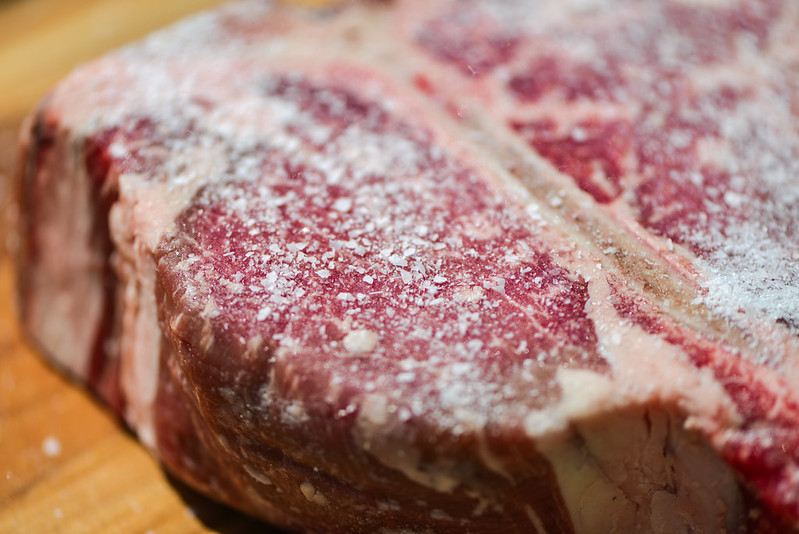
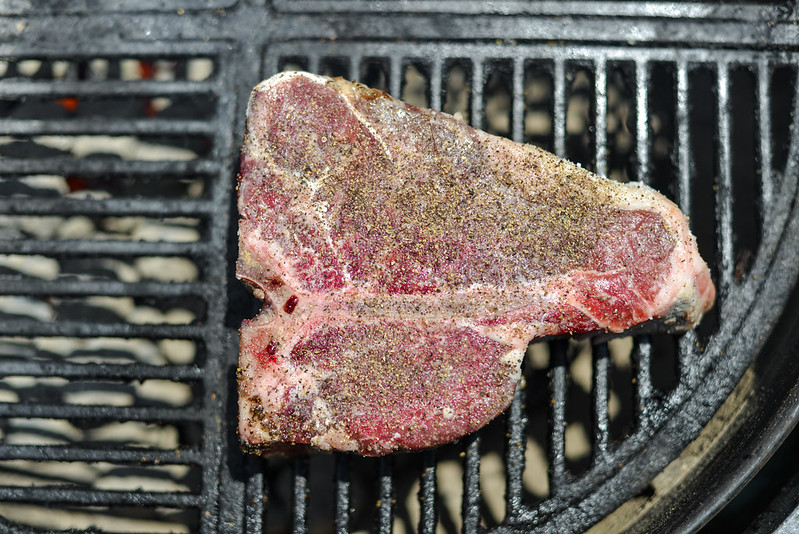
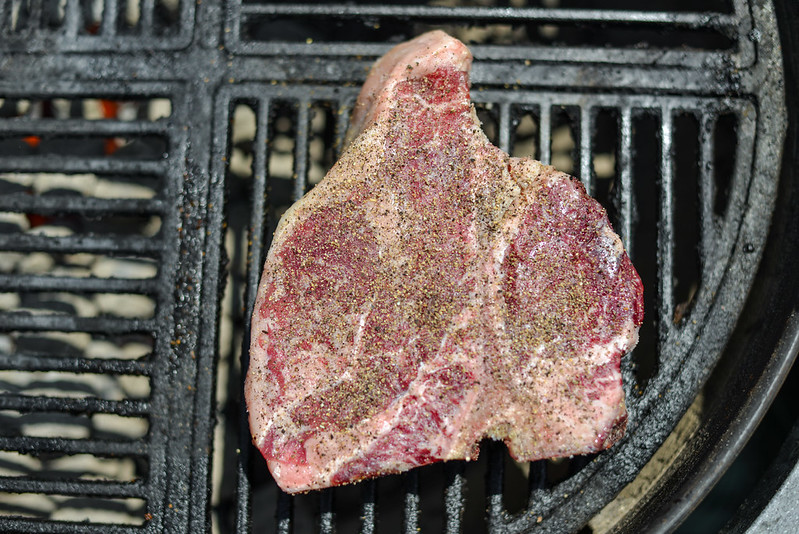
Once you have your perfect T-bone, prep doesn't need to go any further than salt and pepper. Salting should be done at least 40 minutes prior to grilling with heavy layer Kosher salt—remember that you're seasoning for a thick, meaty steak. The salt needs time to first draw moisture out of the steak, and then break down the muscle fibers so that the now-concentrated, flavorful liquid that was drawn out can be reabsorbed.

Right before the steak is ready to hit the grill, it can be given a layer of freshly ground pepper, to taste—I personally like a lot of coarse pepper that gives the crust of a the final steak sharp bite and a little extra crunchy texture.
Some folks prefer adding pepper at the end, claiming that it can taste burnt or bitter if added before cooking, but I like the flavor of charred pepper. It does have a bit of bitterness, but it also attains a sweetness that balances it out.
Grilling a T-bone: Three Methods, One Winner
As I mentioned, I had no intention of destroying any of these beautiful proterhouses I had in my possession in the name of experimentation. So when it came to grill them, I stuck to the methods that I knew would lead to success. While no steaks were harmed in the making of this post, there was certainly one that was better than the rest.
Method I: The Sear and Roast
If you take a stroll back in time, you'll find me proclaiming that the best way to cook a massive T-bone is to sear it over a high direct heat, then move it to indirect heat to finish cooking. This is certainly the method you'll most commonly come across, and it served me well with many a steak. So even though I do things a little differently now, I thought it was only fair to give the sear-and-roast method a fair shot.

To develop a great sear on an uncooked steak, you want to go for the highest heat you can get. With charcoal, this is the point when a whole chimney full of coals has just finished lighting and is covered in gray ash. When I dumped my fresh batch of briquettes out, my thermometer tipped off the scale, but I was likely running around 650°F—lump charcoal will get you a good 50°F-plus higher.
Over this heat, the steak seared beautifully, especially since I flipped it every 30 seconds or so to cook it evenly and maximize that crust. Once browned to my liking, I transferred the porterhouse to the cool side of the grill and positioned it so the strip loin was facing the fire. Then I covered the grill and let the steak cook until it reached my desired temperature of 125°F, for a medium-rare tenderloin.
After a 10 minute rest, I sliced into both the strip loin and tenderloin and was pretty pleased—both had a rosy red, soft center, with not too much grayness around the edges. It was a worthy steak, but I've come to learn that it can be even better.
Method II: The Reverse Sear, Version 1
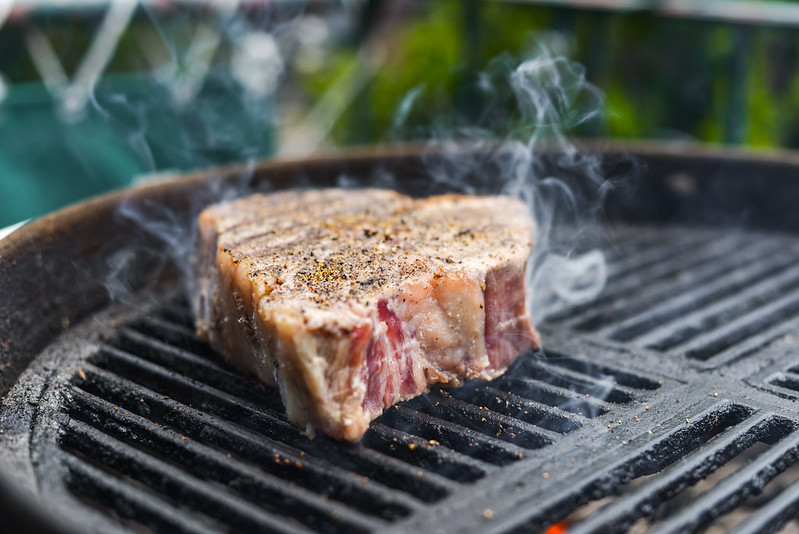
For more an even, edge-to-edge cook in a large steak like this, the reverse sear is your best friend. As the name implies, this method swaps the roasting and searing so the steak is first brought up to a temperature about 5°F below your final desired doneness over indirect heat, then seared over direct heat. This results in a steak that will usually be more evenly red throughout. It's also a more effective way to sear, since the steak's exterior will have less moisture to burn away after it's been cooking for a bit. With a porterhouse, though, I questioned what the best roasting position would be in order to achieve perfect doneness in both the strip loin and tenderloin.
The first theory I tested was the steak should be situated so both the top of the strip loin and tenderloin faced the fire. Since the top of both sections of the T-bone are larger than the tapered bottom, it would make some sense that the top should take longer than the bottom to cook.


As I kept an eye on the temperature of each side of the T-bone, I quickly learned I was wrong. Since the tenderloin has less fat than the strip, it actually cooked faster, registering a good 5° hotter than the strip all through the cooking process. This wasn't going to work out—if anything, given its relatively low fat content, the tenderloin needs to be less cooked than the strip.

In terms of even cooking, it was a decided improvement over the first steak, with a more even rosy color throughout. But we can do better.
Method III: The Reverse Sear, Version 2
With the last of my three porterhouses, I went with the reverse sear again, but this time positioned the strip to run parallel to the fire, with the tenderloin facing away from the coals. As I monitored the temperature this time, the tenderloin was coming in at least 5° cooler than the strip, which was exactly what I wanted to see.
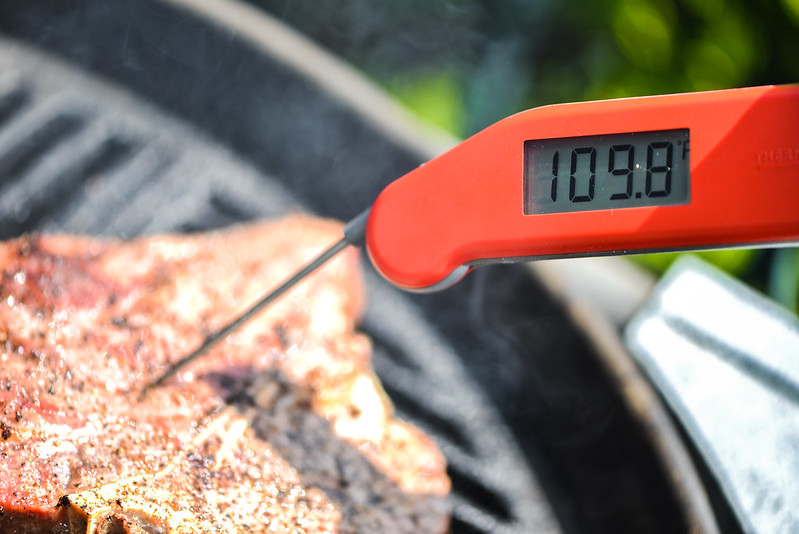
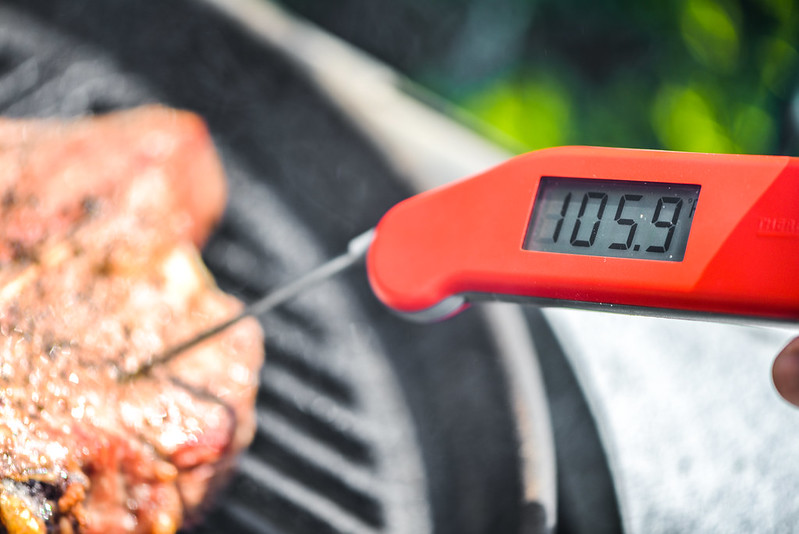
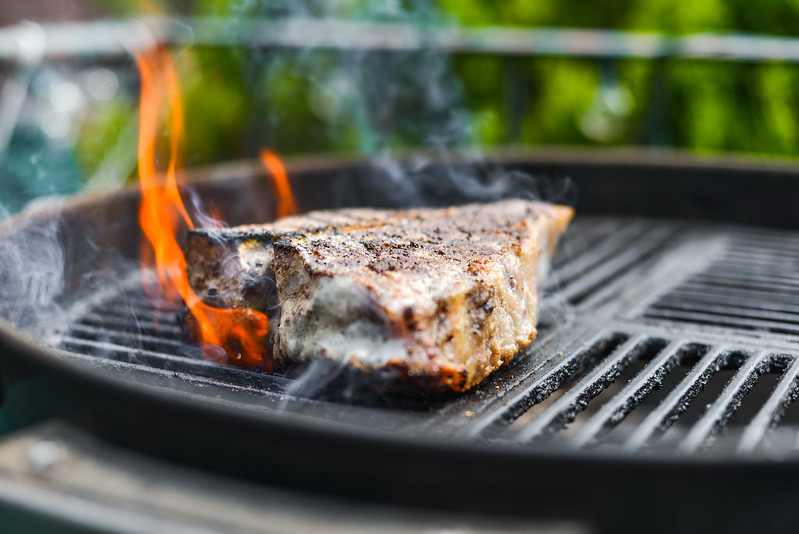
After letting the steak roast until the strip hit 115° and the tenderloin was at 110°, I quickly seared it off, let it rest, and cut in.
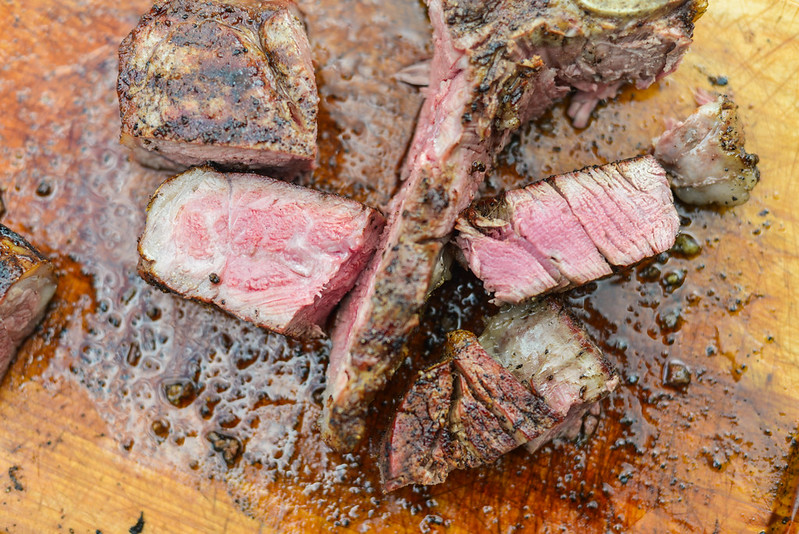
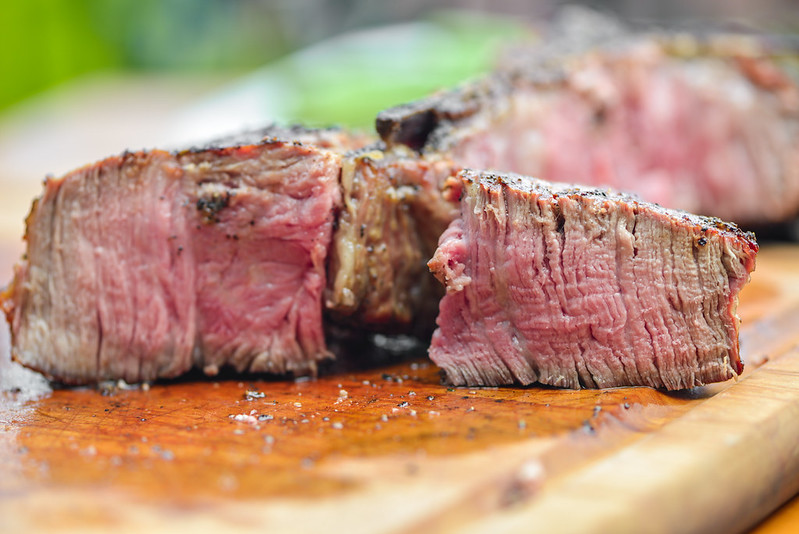
This time around the strip was perfectly medium-rare from edge to edge. The more delicate tenderloin still had a little grayness around the sides, but to a lesser extent than my previous attempts, making this method the clear winner.
T-bone Enhancement
All of those steaks were beefy, salty, peppery, and just all-around delicious. But they were still missing a component of pan-searing steaks that's lost on the grill—butter basting. When cooking indoors with a cast iron skillet, I add some butter and herbs to the pan, basting the seared steak with the rich, melted fat as it cooks.
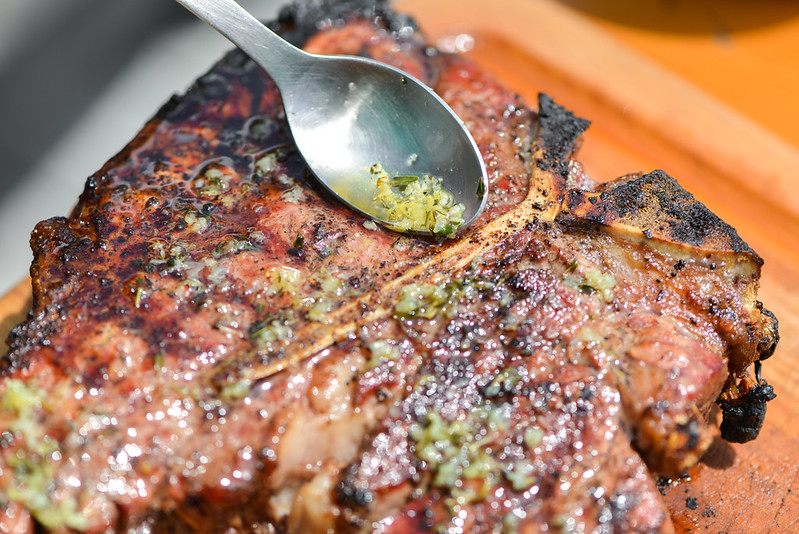
To bring a little of this butter-herb infusion to my grilled steak, I melted a few tablespoons of butter in a small saucepan, then added thyme, garlic, and lemon zest and let those "steep" together as the hot butter cooled. Once that last porterhouse came off the grill, I spread a decent portion of that flavorful butter over the steak while it was resting.
I had a few other tasters with me to help eat through all these steaks, and while each successive T-bone was well-praised, it was the one with the butter that really stood out and had me feeling like I rightfully raised the steaks and earned that title of "#1 Steak Dad" (is it strange that I'm the kind of dad who eats his perfectly charred, rosy-red babies?). Now, if only these babies were able get me a mug stating my achievements so I could properly show it off to the world...
Grilled T-Bone Steak with Garlic Herb Butter
- Yield 4 servings
- Prep 10 Minutes
- Inactive 40 Minutes
- Cook 20 Minutes
- Total 1 Hour 10 Minutes
Ingredients
- For Garlic-Herb Butter (optional)
- 4 tablespoons butter
- 2 teaspoons finely chopped fresh thyme
- 2 teaspoons freshly minced garlic (about 2 medium cloves)
- 1/2 teaspoon lemon zest
- 2 well-marbled porterhouse steaks, cut 1 1/2-2 inches thick
- Kosher salt and freshly ground black pepper
Procedure
- To make the garlic-herb butter (if using): Melt butter in a small saucepan over medium-high heat. When foaming subsides, stir in thyme, garlic, and lemon zest. Remove from heat and set aside.
- Season steaks liberally with salt and let rest at room temperature for 40 minutes.
- Light one chimney full of charcoal. When all the charcoal is lit and covered with gray ash, pour out and arrange the coals on one side of the charcoal grate. Set cooking grate in place, cover grill and allow to preheat for 5 minutes. Clean and oil the grilling grate. Place steaks on cool side of grill with strip loin section facing the fire. Cover grill and position top vent over cool side of grill. Cook steaks, flipping ever 3-5 minutes, until center of strip loin section registers 105° on an instant read thermometer.
- Transfer steaks to hot side of the grill and cook, flipping every 15-30 seconds, until well seared and center of strip loin registers 125° on an instant read thermometer, about 2 minutes. Transfer steaks to a cutting board and spoon on garlic-herb butter, if using. Let steaks rest for 10 minutes, then carve and serve.
You Might Also Like

Comments
-
Kevin Sandridge Steaks look awesome, Josh! Love the reverse sear on thicker cuts. It's a beautiful thing when food science and amazing quality beef have a chance rock and roll. Great post.
-
Chris If we had done this kind of experimenting in school I would have paid more attention in science class! Great looking steaks. Glad you mentioned the difference between porterhouse and tbone because my first thought was that was a porterhouse.
I just bought a prime brisket from LaFrieda's a few weeks ago and wasn't very impressed with it but their porterhouses look out of this world. -
Chad Thompson Some of the prettiest looking steaks I have seen in a while, Josh!
I am so glad that your favorite was the steak with the herb butter. I have been "buttering" steaks for a while and it made me feel like I was "cheating". Nice to have some validation!