Basic Grilled Pizzas

The Meatwave achieves its goal of spreading the meat well, but it's often difficult to get people into the actual process of grilling. I'm always looking for ways of getting people up out of their chairs and to the grill side, actively involved in making their own food. A lot of what I cook is not well suited for this task, so I'm often my own worst enemy in enhancing the Meatwavers cooking experience, but I made up for this by having a party revolving around what must be the most interactive of grilling activities, pizza making.
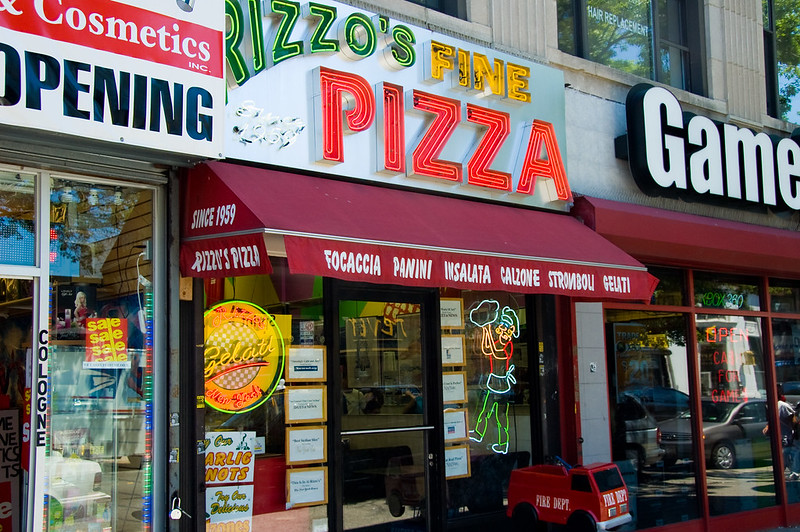
Dough/bread making and me don't seem to get along, it's always seems just out of my reach. Although I have not given up the battle quite yet, I didn't feel it was right to bring all my friends in it with me. So when I decided to have the Meatwavers grill pizza at Swim Meat, I tought it would be best to buy the pizza dough instead of ending up with whatever sorry excuse that I would have made. You know your favorite pizza place? The one that your probably longing for already by just the mention of the word pizza? That should be where you get your dough from. I like going local, and crust speaking, Rizzo's can't be beat in Astoria. They have a dough that produces a very light and crisp slice, a uniqueness that I now equate with my neighborhood. If you haven't had Sicilian Rizzo's slice, I suggest you waste no time and head out to Astoria for one of your own right now (it's on Stienway, just south of 30th Ave, so not knowing where it is not an excuse).
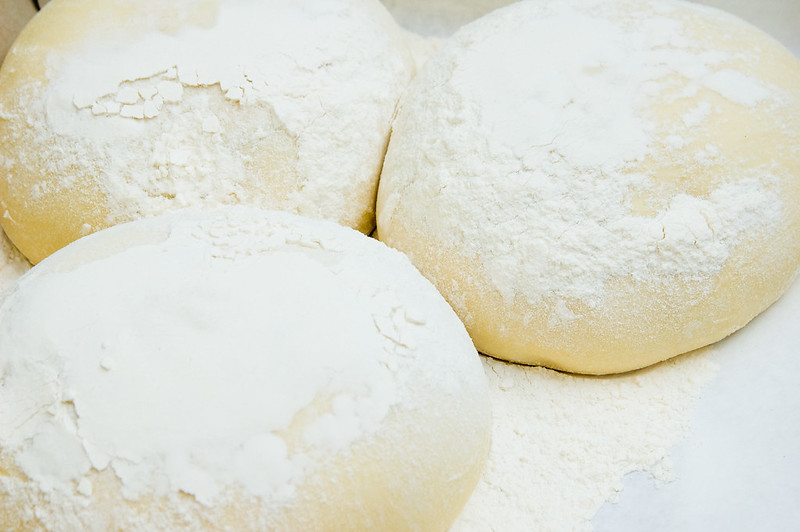
Even if your local pizza place doesn't sell dough on a day to day basis, I'll bet they'll be willing to sell you some if you just ask. I went to Rizzo's Friday night and asked them if they could have enough dough ready for me on Saturday to make about 15 8-10" pies. They were more than happy to comply, and the best part was it ended with me downing a couple Scilian slices. When I went back on Saturday, they had 3 balls of dough waiting for me, and after a couple more slices, I took them home and put them each in their own oiled bowl, covered them with a cloth, and left them in the fridge, a process recommended to me by the fine people at Rizzo's.

Around 4 hours before we were going to start grilling, I removed the dough from the fridge and left them out to come to room temperature and continue to rise. When it came time to start making the pizzas, everyone grabbed a piece of dough, about the size of a fist, and started stretching. Stretching dough is not as easy as it looks on TV, and everyone who tried tossing it ended up with pizza that tasted like my ceiling or floor. I found the best way to tackle the stretching was is to start working the from the center and use your left hand to rotate the ball, while your gentle stretch it our with your right. Eventually gravity started to help with the stretching, and I ended with a dough that was paper thin in the middle, with a thicker outer rim for the crust.
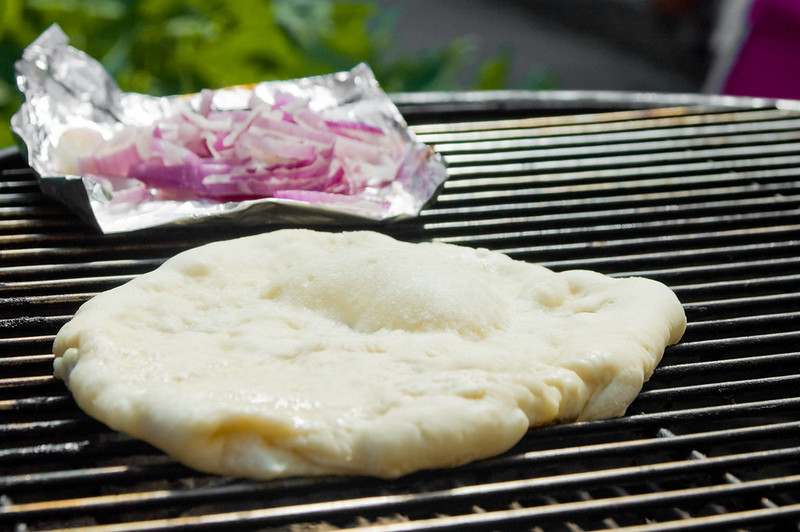
I found that a mutli-step approach is the best for grilling pizza. If you just assemble your toppings and throw the thing on the grill, you might be left with either a very burnt crust once the toppings are finished cooking, or a perfect crust with undercooked toppings, either way is a recipe for pizza failure. To avoid the horrors of a poorly cooked pizza, I first built a two zone fire, with all the coals on one side of the charcoal grate. I then sprayed one side of the pizza dough with olive oil and placed that side down, directly over the hot coals.
I let this side of the dough cook until it started turning a nice brown and was slightly crisp. This only took a couple minutes, so it's important to stay next to the grill and keep on eye on the dough, since it's a quick transition from nicely brown to burnt. When the dough was ready, I took it off the grill and put it on a plate. Then I sprayed the cooked side with a little more olive oil and assembled the toppings while the pizza was off the grill. Since, like with stretching dough, it seems easier and faster to top a pizza on TV, I found it essential to do this process off the heat, since the dough would most definitely burn in the amount of time it took for me to create my pizza masterwork.
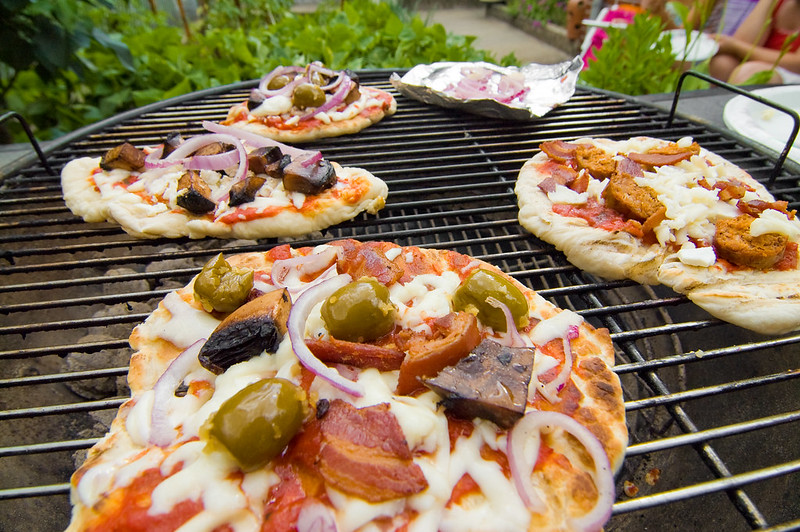
Once the pizza was topped, it went back on the grill. This time it went down on the cool side of the grate, then I covered the grill and let it sit until the cheese was melted. Not being directly over the heat, I didn't have to worry about the dough burning while the cheese melted, which reduced the chance of failure drastically. When the cheese was melted to my liking, I just scooted the pizza over to to the hot side of grill again and let this side of the dough finish cooking, getting a little deeper brown and crispier than the first side.
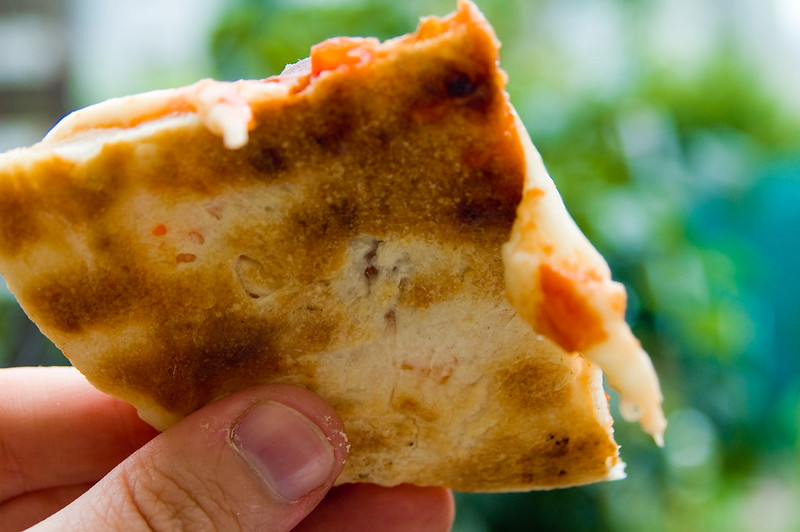
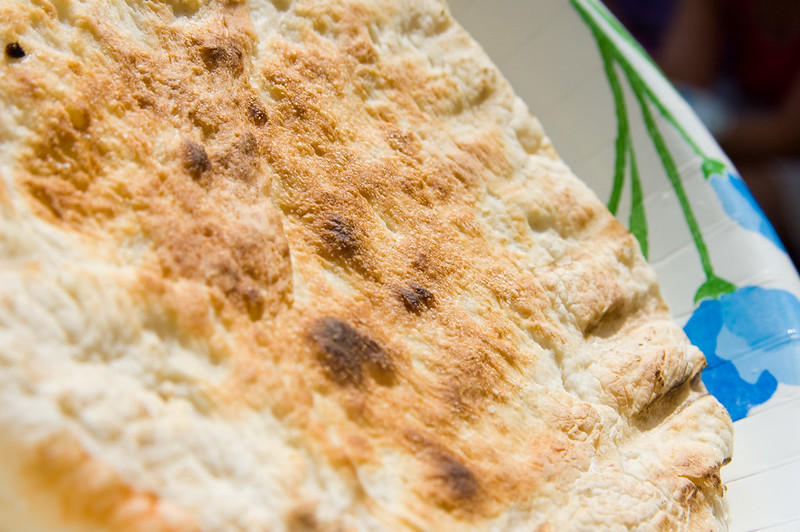
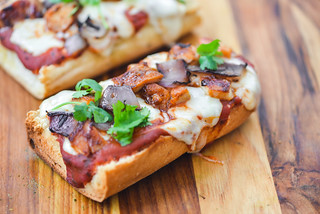
Now all that's left is slice and enjoy. A grilled pizza is far superior then anything I have ever made my oven. The reason is heat. You need tons of heat to get the great crisp crust you expect on a pizza, and an oven just can't match the type of heat produced in a lump of hot coal. A short cooking time over a very high heat will produce an exceptional crust, but unlike an oven, the heat isn't multi-directional. This makes it important to take a multi-step approach when grilling pizza in order to achieve a balance of a perfectly cooked crust with perfectly cooked toppings. Producing an excellent pizza is a good feeling, but it doesn't match seeing all my friends around the grill, actively being part of their own cooking and churning out one delicious creation after another.
You Might Also Like
Comments
-
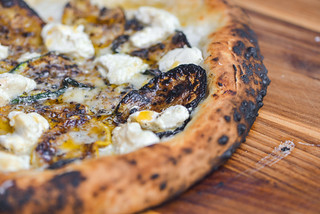
Mel Mazz What are your toppings (besides bacon!) on the first pizza pictured? It looks delicious! Thanks for all the grilling tips; I ventured into pizza grilling this weekend and was surprised at how easy it was. Now, to develop the best possible crust (unlike you, I always want to conquer the bread!) Thanks for a great entry.
-
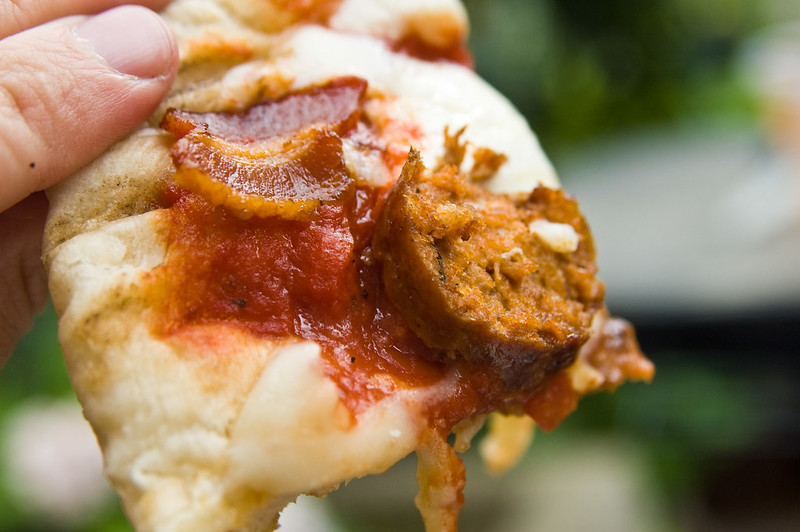
The Meatmaster @Mel Mazz: That wasn't my pizza, so I'm a little fuzzy on the exact toppings, but from the looks of it, it has bacon, grilled chicken, mozzarella, gorgonzola, and ricotta salata (no sauce). I plan on trying my hand at pizza crust again someday, I just didn't want others to have to suffer from my bread failings :)