Sous Vide and Grilled Pork Belly Buns

My Anova Precision Cooker was totally an impulse buy when I saw I could still get in on the ground level during their Kickstarter campaign a couple years back. I never really felt the need to own a sous vide-style device before, but there was something appealing to having it at my disposal. After finally receiving it though, I couldn't think what I normally cook that I wanted to try to improve via sous vide, but then it hit me—pork belly! My pork belly has been alright, but never as soft and luscious as what I get in a restaurant, and saw a slow, controlled cook as being a way of bringing my belly game into the big leagues, and these buns certainly did that.

Being a sous vide novice, I had to rely fully on assistance on this first go around, and I found that guidance and inspiration by way of J. Kenji Lopez-Alt—my trusted go-to for almost any recipe or technique. I figured it would be hard to go wrong with the recipe for Asian pork belly buns which started with a whole hunk of boneless, skin-on belly.
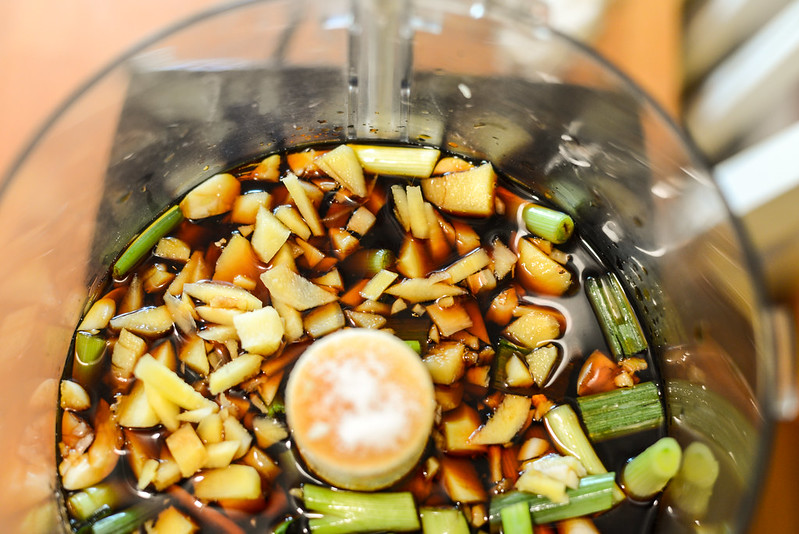
For maximum flavor, a "marinade" was added to the pork during cooking that consisted of soy sauce, mirin, sugar, fish sauce, scallions, garlic, and ginger. All these ingredients were combined in a food processor until roughly pureed, but not totally liquified.

I then poured this mixture in with the pork and sealed the bag. Without a super fancy vacuum sealer, this required a good eye to stop the suction and begin the sealing before liquid start spewing out of the bag.
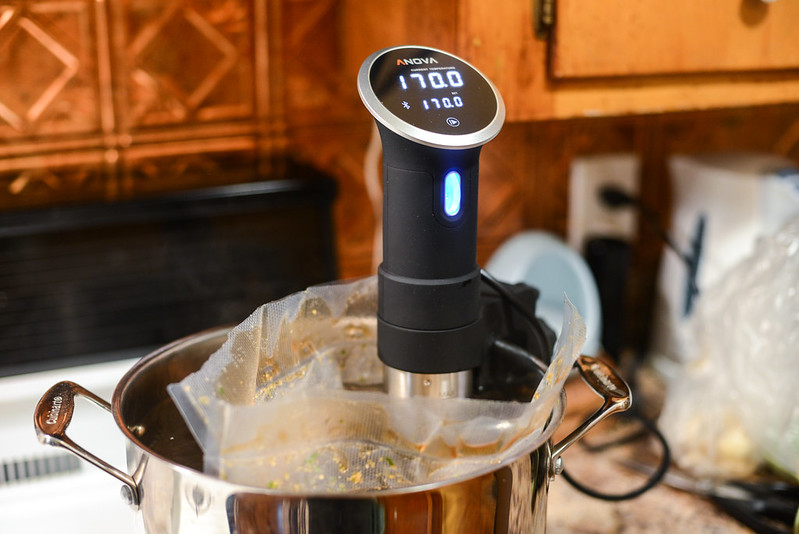
Not sure if it was my sealer or what, but after a couple hours in the bath, my bag sprung a leak. This had me jumbling around trying to save as much precious liquid as possible while also considering my next move to get this belly cooked. I ended up using heavy duty Ziploc bags instead, which felt a little precarious, but ended holding up fine through the remaining eight additional hours of cooking in the 170°F water bath.

I took about twenty minutes of that ten hours to make the quick pickles that would later adorn the buns. These incredibly delicious pickles were made by submerging very thinly sliced seedless cucumbers in a rice vinegar, sugar, and water mixture for ten minutes. Then I strained them, placed them in a jar, and added enough pickling liquid back in to completely cover the pickles before storing them the fridge.

After the pork belly was done, it also went in the fridge overnight to completely chill. The next day I removed the now congealed liquid from the belly, discarded any large chunks of pure fat, and placed the gelatinous goo in a saucepan over medium heat. Once it was in a liquid state again, I strained out the solids and continued simmering the sauce until reduce to just a couple tablespoons.

Then I mixed this super concentrated, savory, and porcine liquid with mayo to make one hell of a tasty sauce. It's exactly these types of ideas that make Kenji's recipes really special in my opinion—using the braising sauce in this exact manner isn't something I probably would have thought of on my own, but it's sure in my mind for future recipes now.
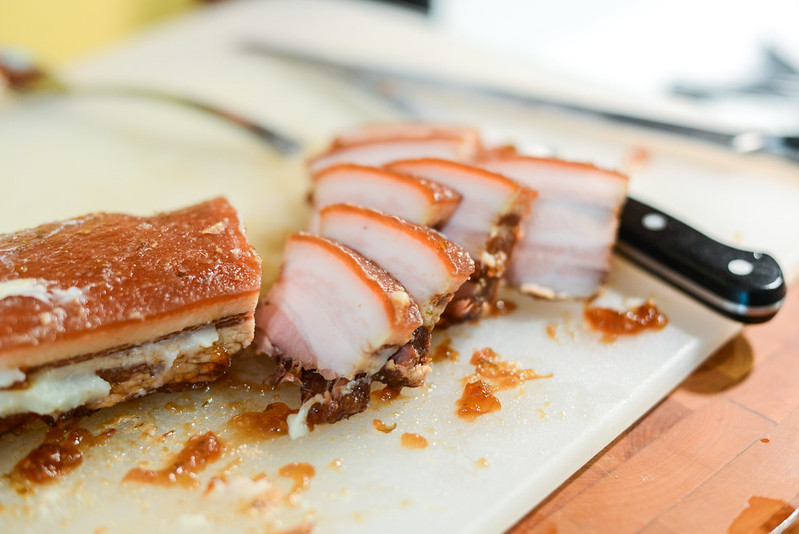
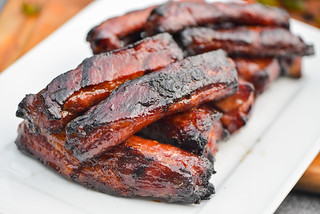
With so much attention taken to the other components of these buns, I couldn't wait to get back to the reason I chose this recipe in the first place—the pork. Even cold, this belly was incredibly tender. I was a little skeptical at first that leaving the skin was a good idea—I didn't believe it wouldn't end up chewy and gross, but even that cut like butter. With what seemed to be a perfectly textured meat, I couldn't wait to grill it up and get to the final results.
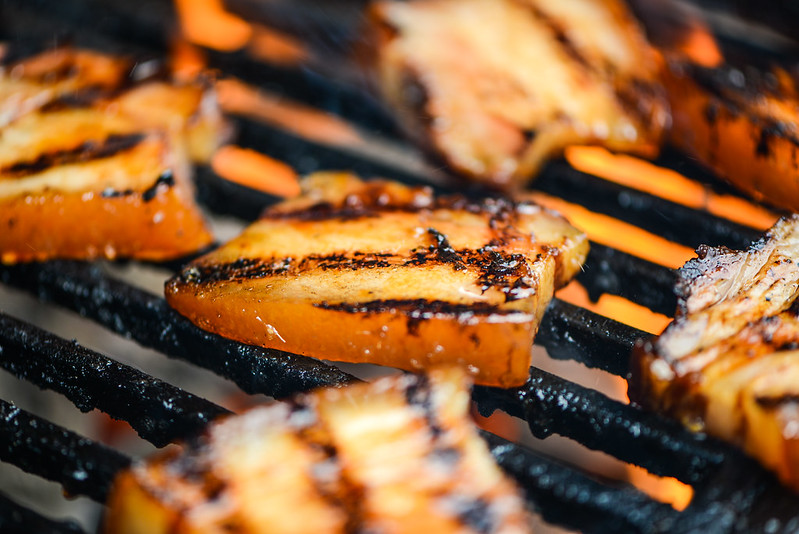
Since the pork was fully cooked to its ideal texture, all I was looking to do on the grill was reheat the slices of belly and get some nice crispy bits on them as well. With the slices cut about 1/4-inch think, it only took a couple minutes per side until I had some nice charring and the pork heated throughout without it falling apart.
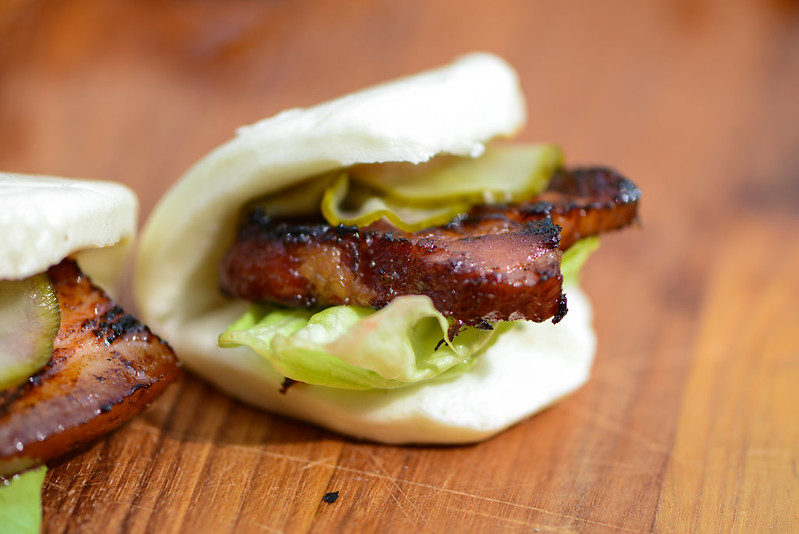
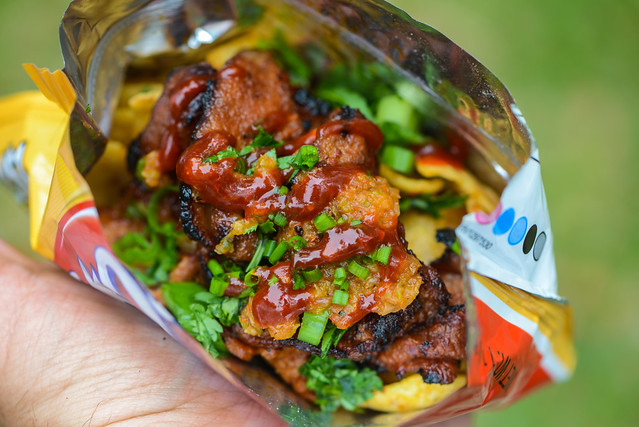
All that was left was to assemble it all together starting with steamed Chinese buns, to which I add a piece of bibb lettuce, a slice of pork, a few quick pickles, and a spread of the mayo. Man, were these incredible. All the savoriness and tender, fatty, flavorful pork made me totally forget that sous vide mishap early on that soured this initial go around with a cooking method that was new to me. I was totally convinced that, for at least pork belly, my immersion circulator could be my best friend. I've since learned it does a pretty damn good job with steaks as well, and I can't wait to see what other fun I can have with this newish device in my arsenal.